Man, what a journey. Took me quite some time to crack this one down, so let’s start by defining what possible choices you have to connect your LG TV for ambient lightning:
- Using PicCap for grabbing video feed and sending it to a Hyperion instance. That requires rooting the TV, which in itself requires enabling dev mode, creating a dev account, installing homebrew channel and following very precise instructions to proceed further.
- Hosting the Hyperion instance straight on the TV itself. That will require root, but some might find this option appealing as they might not have the possibility to host their own Hyperion instance at home as in the 1st example. This would also use PicCap or Hyperion webOS grabber.
- Getting an external grabber device and using that in order to send the feed to Hyperion. Might be the least intrusive way to do, but more clutter / cabling included.
For this one we will focus on the first scenario. The other choices could be more appealing in your situation, but in my case, I wanted to have some more fun with linux by setting up a Hyperion instance as well as messing with my TV. I also wanted to eliminate as many cables as possible and make it less technical in case I need to maintain everything.
Well then, what do we need to do for that first scenario:
- Spin up a Debian/Ubuntu/Fedora VM/CT. Install Hyperion on that VM/CT.
- This was covered in my previous post, so we will only cover what comes next.
- Root the TV by following instructions.
- Install PicCap and configure Philips Hue products via the Hyperion web GUI.
Rooting the TV
This process is very precise. It is easy to make a mistake, but also easy to start over again. In my particular case, we’re using LG OLED 55C22. It is a 2022 model with the newest firmware that was available at the time of doing this: webOS 7.3.x. That means that using any kind of automated means to root the TV is now impossible and you have to do it manually.
To do it manually, you have to follow these instructions:
- IMPORTANT: Turn off Quick Start+. This is available in
Settings -> General -> Devices -> TV control -> Quick Start+. - Enable Developer Mode. Install the Developer application from the App Store. Log into your Developer Account (if you don’t have one – create one in the developer portal on LG website). Set
Dev Mode Statusto enabled. This will prompt you to restart the TV. - After the restart, open the Dev app and enable
Key Server. - On your computer, open
webOS Dev Manager. In our case, we used that on macOS. Connect to the TV using the Dev Manager. You will need the IP address and the passphrase. - After connecting, install
Homebrew Channelto the TV via the webOS Dev Manager. - Turn off the TV. Unplug it. Wait a reasonable amount of time. If you want to be sure, about 2 minutes should guarantee success.
- Turn the TV on. Open Dev app, check if the Key Server is still up. If not, enable it again.
- In the webOS Dev Manager, open
Terminal. In the terminal, paste this command:
curl -L -o /tmp/jailpatch.sh https://raw.githubusercontent.com/throwaway96/install-jail-conf/main/jailpatch.sh && sh /tmp/jailpatch.sh- After running the command, turn off the TV again and unplug it for the same amount of time.
- While I have not delved into how does this grant us more permissions, but the main difference that this restart makes, is the ability to enable telnet, which typically isn’t possible due to insufficient permissions. Typically, telnet is hidden in
/var/log/. If you go to this path via terminal you will see that there are no files there, but there are – they are hidden. After this patch, telnet is also available in/var/log/crashd/.
- While I have not delved into how does this grant us more permissions, but the main difference that this restart makes, is the ability to enable telnet, which typically isn’t possible due to insufficient permissions. Typically, telnet is hidden in
- Turn on the TV, enable Key Server if needed. Open Terminal once again and execute the following command:
touch /var/log/crashd/"x;telnetd -l sh"- This should successfully give you a blank message, which means that telnet might have successfully launched on the TV_IP:23.
- If you get a message that says permission denied or there is no such file or directory, repeat from beginning as you might have messed up a step or two (could be that you didn’t wait long enough, didn’t disable Quick Start+, didn’t unplug / turn off the TV completely).
- Now you have to use telnet to connect to the TV. On Windows you can use PuTTY, on macOS you can use Homebrew (similar to yum or apt on Linux) to install telnet to your Terminal and connect to the TV that way.
IF YOU DO NOT USE MACOS, SKIP TO STEP 16
- If you decided to use Terminal on macOS, what you need to do is execute this command in terminal:
/bin/bash -c "$(curl -fsSL https://raw.githubusercontent.com/Homebrew/install/HEAD/install.sh)"- After that, set a PATH for homebrew, which will include running two commands, that should look similar to these (they will be given to you in the
Next Stepssection once the previous command finishes):
echo 'eval "$(/opt/homebrew/bin/brew shellenv)"' >> /Users/%YOUR_USER%/.zprofile
eval "$(/opt/homebrew/bin/brew shellenv)"- Once you do so, you can use
brew install telnetand proceed with the following steps connecting via telnet to the TV.
Connecting to the TV via Telnet
- Proceed by using this command in order to connect to the TV (using Terminal or PuTTY):
telnet YOUR_TV_IP 23- After that you should be connected to the TV.
- If you get a Connection Refused error, that also means you made a mistake in one of the many steps before, which means you might have to re-do the whole thing again.
- Execute these commands via telnet (paste them into the terminal):
unset LD_PRELOAD
/media/developer/apps/usr/palm/services/org.webosbrew.hbchannel.service/elevate-service
mkdir -p /var/lib/webosbrew/init.d
cp /media/developer/apps/usr/palm/services/org.webosbrew.hbchannel.service/startup.sh /var/lib/webosbrew/startup.sh
rm -rf /var/luna/preferences/devmode_enabled && mkdir -p /var/luna/preferences/devmode_enabled- Once the commands succeed, delete the Developer App. If you do not do so, you will not be able to use SSH.
- Reboot the TV.
- After the TV reboots, you can turn on Quick Start+. You can also disable updates in Homebrew Channel app. You can also check whether the root procedure was successful in the Settings of the app (root status should be visible as
ok).
Installing and configuring PicCap
Now that we have rooted our TV, you have to install the PicCap app on the TV, which can be done via webOS Dev Manager or the Homebrew Channel on the TV (whichever you prefer). Once you do so, follow these instructions:
- Open the PicCap app. Wait for it to receive elevated privileges. The status of that is visible at the bottom of the app.
- Once the privileges are granted, open Settings in the app. There you should see various parameters, such as IP address, port, priority, resolution, framerate.
- If you have your server running and got elevated privileges, some of these should already be prefilled. Regardless, what you need to fill out is here:
- IP address: The IP address of your Hyperion instance;
- Port: 19400 (Flatbuffer server);
- Priority: The default is 150 I believe;
- Resolution: You may pick whichever you prefer, I run it on the highest;
- Framerate: Default is 30. You can set it to 60 if you wish.
- You may also enable AutoStart if you want the app to start syncing every time you turn on the TV. You may also enable VSync so the content is interpreted properly.
- Click Save.
Connecting Philips Hue to Hyperion
Now we have to configure our Philips Hue products on the Hyperion web GUI. Do keep in mind that you must have a Hue Bridge and at least 2 lights assigned to an entertainment hue area. In my case, I had two Philips Light Bars that I set up via the Philips Hue app.
The procedure is as follows:
- Open the Hyperion web GUI which should be
YOUR_HYPERION_IP:8090. Open that on the browser. - Open the following menu:
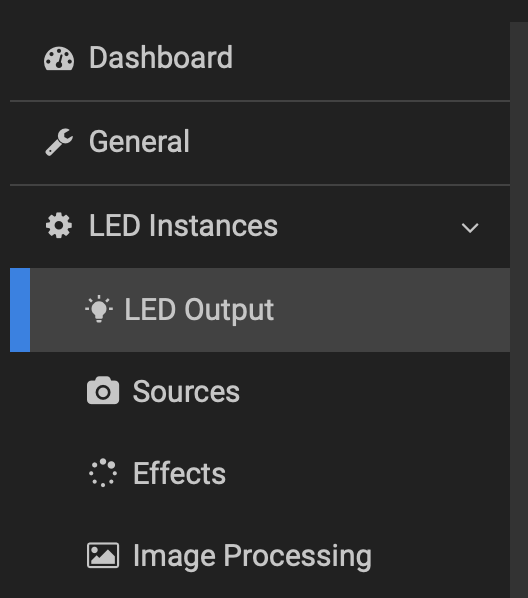
- In that menu, you will be on the first tab –
LED Controller. - Select
philipshueas the controller type. Press and follow the instructions given by thePhilips Hue Wizard/Philips Entertainment Hue Wizard. - After you complete the wizard and assign the lamps their appropriate places (if you found that the preset values are perfect for you), you can preview the live feed and assigned LED zones in the second
LED Layouttab.- This tab will allow you not only to view the live content that is being sent to the Hyperion instance, but also configure the zone sizes.
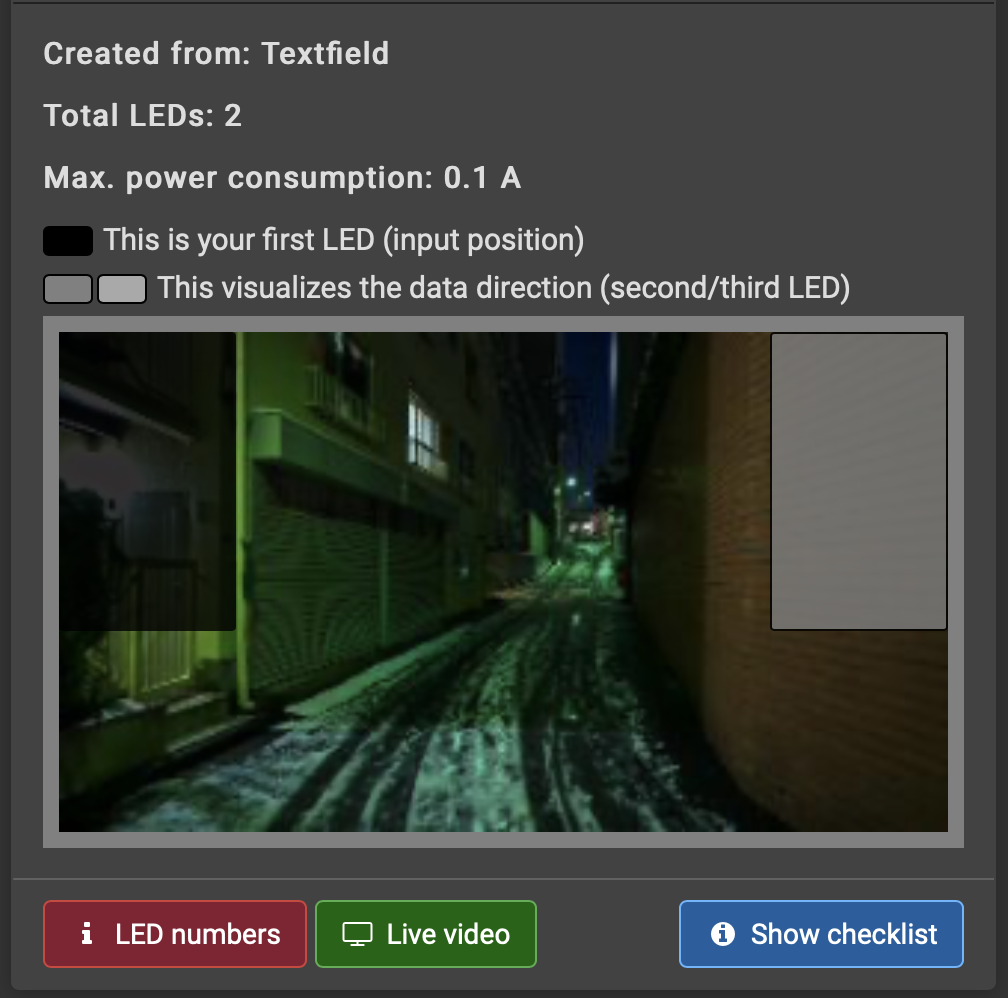
After that, you might as well just press Save Layout and that’s it. You can edit various parameters in the LED Output menu if you feel like you need more brightness or need to alter some values to change the way the lights behave.
Enjoy your Philips Hue ambient lightning powered by your local server!
Resources that helped me reach this point
- Instructions on github for rooting my LG TV: https://gist.github.com/throwaway96/e811b0f7cc2a705a5a476a8dfa45e09f?permalink_comment_id=4619569
- PicCap github page: https://github.com/TBSniller/piccap
- Hyperion documentation on installing: https://docs.hyperion-project.org/en/user/Installation.html
A lot of stuff was done in preparation which is included in my previous post, especially regarding some issues installing Hyperion on the latest releases. The previous post can be viewed here:
Leave a Reply